Image galleries/sliders are particularly useful for photoblogs, but they could also serve those who occasionally need a gadget like this. As we have seen in a previous tutorial, on the top of the main thumbnail, we have had some smaller thumbnails which were enlarged at the bottom each time an image was selected. The difference is that we had to click the thumbnail in order to show a larger version which was acquired with JavaScript.
This time will use only hover and CSS. To see it in action, visit the demo blog:


Step 2. Click anywhere inside the code area and press the CTRL + F keys to open the Blogger search box
Step 3. Paste the </head> tag inside the search box and hit Enter.
Step 4. Just above the </head> tag, add this code:
The position: absolute of the larger thumbnails (.large-thumbnail) pulls them out and places them in the spot that we've chosen using a value of 800px for the top property.
The mini-thumbnails which are actually a second image, stay all the time above in a static position and are slightly modified only in terms of style for distinguishing the active (a:hover .mini-thumbnail) on mouse over.
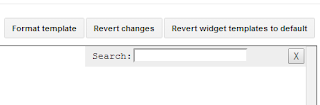
Step 5. Save the changes by clicking the Save template button.
And finally, we need to add the HTML code.
Step 6. Paste the below HTML structure to where you want to display the gallery by going either to Layout and add a new gadget (click on the Add a gadget link and choose HTML/JavaScript), or inside a post or page within the HTML section.
To add pics inside the image slider, replace MINI-THUMB-URL and LARGE-THUMB-URL with the URL of your images. Note: The last LARGE-THUMB-URL1 should be replaced with the URL of the default image that will appear on your slider.
If don't know how to get the images URL, visit this tutorial: How to upload images and get their URLs
Now, Save your widget/gadget or publish your page/post and you're done. Enjoy!
This time will use only hover and CSS. To see it in action, visit the demo blog:

How to Add A CSS Image Slider with Thumbnails to Blogger
Step 1. Log in to your Blogger Dashboard and go to Template > Edit HTML
Step 2. Click anywhere inside the code area and press the CTRL + F keys to open the Blogger search box

Step 3. Paste the </head> tag inside the search box and hit Enter.
Step 4. Just above the </head> tag, add this code:
<style type='text/css'>Here we set a specific height (530px) so that we can slide an image out of the margins of the container and have it hidden with (overflow:hidden);
.image-container {
position: relative;
width: 100%;
height: 530px;
margin: 0 auto;
text-align:center;
overflow: hidden;
}
.image-container a {
display: inline;
text-decoration: none;
}
/* Mini-thumbnails style */
.mini-thumbnail {
width: 18.4%; /* mini-thumbnails width */
margin:1px;
opacity: 1;
-webkit-box-shadow: 0px 0px 3px rgba(0,0,0,0.5);
-moz-box-shadow: 0px 0px 3px rgba(0,0,0,0.5);
box-shadow: 0px 0px 3px rgba(0,0,0,0.5);
}
/* Style for the main thumbnail */
.large-thumbnail {
position: absolute;
width: 100%;
top: 800px;
margin:0 auto;
text-align: center;
display: block;
-webkit-transition: top 1s ease;
-moz-transition: top 1s ease;
-o-transition: top 1s ease;
-ms-transition: top 1s ease;
transition: top 1s ease;
}
.feature {
top: 85px;
width: 100%;
opacity: .3;
}
/* style for the selected mini-thumbnail */
a:hover .mini-thumbnail {
opacity: .5;
-webkit-box-shadow: 0px 0px 10px rgba(0,0,0,0.5);
-moz-box-shadow: 0px 0px 10px rgba(0,0,0,0.5);
box-shadow: 0px 0px 10px rgba(0,0,0,0.5);
}
/* transition effects for the selected image */
a:hover .large-thumbnail {
top: 85px;
width: 100%;
z-index:3;
opacity: 1;
-webkit-transition: top 1s ease;
-moz-transition: top 1s ease;
-o-transition: top 1s ease;
-ms-transition: top 1s ease;
transition: top 1s ease;
}
</style>
The position: absolute of the larger thumbnails (.large-thumbnail) pulls them out and places them in the spot that we've chosen using a value of 800px for the top property.
The mini-thumbnails which are actually a second image, stay all the time above in a static position and are slightly modified only in terms of style for distinguishing the active (a:hover .mini-thumbnail) on mouse over.
Step 5. Save the changes by clicking the Save template button.
And finally, we need to add the HTML code.
Step 6. Paste the below HTML structure to where you want to display the gallery by going either to Layout and add a new gadget (click on the Add a gadget link and choose HTML/JavaScript), or inside a post or page within the HTML section.
<div class="image-container">Here, we left the link empty (javascript:void(0);) but you can add one if you want. Just replace javascript:void(0); with the URL of your page/post.
<a href="javascript:void(0);">
<img class="mini-thumbnail" src="MINI-THUMB-URL1" />
<img class="large-thumbnail" src="LARGE-THUMB-URL1" />
</a>
<a href="javascript:void(0);">
<img class="mini-thumbnail" src="MINI-THUMB-URL2" />
<img class="large-thumbnail" src="LARGE-THUMB-URL2" />
</a>
<a href="javascript:void(0);">
<img class="mini-thumbnail" src="MINI-THUMB-URL3" />
<img class="large-thumbnail" src="LARGE-THUMB-URL3" />
</a>
<a href="javascript:void(0);">
<img class="mini-thumbnail" src="MINI-THUMB-URL4" />
<img class="large-thumbnail" src="LARGE-THUMB-URL4" />
</a>
<a href="javascript:void(0);">
<img class="mini-thumbnail" src="MINI-THUMB-URL5" />
<img class="large-thumbnail" src="LARGE-THUMB-URL5" />
</a>
<a href="javascript:void(0);">
<img class="large-thumbnail feature" src="LARGE-THUMB-URL1" />
</a>
</div>
To add pics inside the image slider, replace MINI-THUMB-URL and LARGE-THUMB-URL with the URL of your images. Note: The last LARGE-THUMB-URL1 should be replaced with the URL of the default image that will appear on your slider.
If don't know how to get the images URL, visit this tutorial: How to upload images and get their URLs
Now, Save your widget/gadget or publish your page/post and you're done. Enjoy!
Relax and enjoy, don't be rush.
ConversionConversion EmoticonEmoticon